Showing posts with label Levi. Show all posts

Saturday, July 9, 2011

4 days to an F-16 (wood)

In mid-April, I made a mistake: I downloaded a trial version of the Xbox360 game Ace Combat 6 in which you fly an F-16.

I called Levi down and showed him the game -- I expected him to want to fly the plane like he does on my computer (Microsoft Combat Flight Simulator 1, 2, 3); instead, Levi starts his "build me one out of wood" routine. Two weeks later I finally relented.

I decided to build it to 1:48 scale since I have a plastic F-16 model of that size that used to hang in Levi's room (he took it down to play with, so now it is in "daddy's museum" (or on a closet shelf out of little boy reach). I went online and found a set of plans for 1:48 F-16 wood model construction with the various variants, cross sections; in short, everything. All I needed was a top and side plan and we were good to go. While my initial thoughts were to take a piece of 2x4 to do the main body, after rummaging in my scrap wood pile I decided on a different tactic: I took a piece of 2x4 and sliced it down to make the main body, including rounding the nose. To get the curvature of the plane on the sides, I ran it on my combination disc/belt sander against the top roller of the belt sander -- with 60 grit sand paper, it quickly wore away a nice curve on the body. For the air intake and engine, I took a 1" dowel and sliced it down the middle, but left a chunk on one end. Back to the combo sander, this time using the disc sander to create an engine. For the cockpit, I actually took a square block, cut the main angles on the sides and the top, and then disc sanded it to round it up. Last came the wings and tail which comes from 1/8" scrap -- angles were cut on 12" bandsaw.

As you can see in picture with Levi, parts were rough sanded and were ready for gluing. Since this was going to be a play toy, I decided to make the wing one solid piece. In addition, I grooved out the underside of the body for the wing to attach and be flush with the body. On the bottom, the "air intake/engine" piece was attached with wood glue and a few strategically placed 5/8" brads were used to hold the body components together. Once they were set (60 minutes) I moved the clamps into a holding position and then attached the cockpit, tail components and the fins on the underside. By this time, Levi was asleep, so the airplane was able to dry very well over night.

The next challenge was what scheme to paint it - we did a search of F16 images on the internet and looked at hundreds of them. Levi decided this was the airplane he wanted. he called it the "dancing" chicken -- I believe it is a griffin. The cool thing for me was that it is a Danish aircraft, so there is some ancestral pride in trying to achieve this look.

Initial light color
First task after doing finishing sanding was to paint the "light" parts of the F-16, as well as get the color set for whatever that is on the tail. So I went with a light Testor's grey, and sprayed the key areas. I wasn't sure how well the paint would work since it is an oil based paint for plastic models, but it worked just fine. You might notice a little red on the cockpit: in the day or so that the aircraft was waiting to be painted, Levi drew a cockpit line because his plane was going to have 2 pilots. He was not happy I over sprayed it, but I promised to make the cockpit for 2 people.
Darker color

Next up was darker areas. I decided to mix a Testor's medium grey with a sea blue to give it a kind of blue/grey tint which I expected to feather into the lighter color, but be different enough to somewhat stand out. You might notice the tubing and such next to the F16 on the right; that is my spray gun. It is a standard Testor's spray gun, around $20 that is made to hook to a can of compressed gas. I've had thing for 20 years so now. Since I wasn't interested in shilling out the cash for the small cans of compressed gas, I decided to do a little modification to so that I could hook it to my air compressor. $4 in brass parts and 2 hours later (yes, it took me 2 hours sitting in a True-value store to get the right combination of parts that would work -- I wish I wrote down what made it successful!) I now am able to use my Kobalt air compressor to power my little sprayer. First thing I had to learn was to dial down the pressure. I now typically spray around 20 PSI tops.
Close up of dancing chicken

One happy owner
Now came the fun part -- how to get the tail art in place. I went back to the picture of the F16; it was reasonably in profile, so I loaded it into MS Office Picture Manager and scaled it up until it was 1:48 scale. Then I printed it out twice. One sharp x-acto blade, and 30 minutes later, I had cut out the art. Based on a previous, somewhat fiasco with a paper mask attempt, I decided to use a glue stick to temporarily attach the mask to the tail. I then masked off the rest of the plane, and using some red acrylic paint we had lying around from some other project, I painted the tail red. After a minute or so of set time, I carefully peeled the mask off, and was very pleasantly surprised at how well the detail came out. Finish painting included painting the cockpit white, and the obligatory stripe making it for 2 pilots.

While I was ready to start thinking of decals, Levi had other ideas -- he wanted to be able to see the pilot flying the plane. I spent a little time looking at potential pilots on the web, but did not find what I was looking for.

I knew Levi would expect to be able to see the face of the pilot from the front, and the side of their heads when they were viewed from the side. I couldn't find enough good pictures to let me do that. For a moment I thought of trying to paint something, but then an idea struck me: have Levi be the pilot and Lucy the other one.


Without telling them why, I had them sit down in front of the garage door, and I took a series of pictures. For Levi, I took one from the front, and then made him turn, and took a left and right profile picture. This would give me the necessary angles to meet his demands.

For Lucy, since she was going to be the back pilot, I decided to have her look at me for her left profile, and for her right profile, I took a picture of the back of her head (she had to think I was crazy).

Pilot detail
I then scaled the pictures down so they would fit on the cockpit, printed them out and cut them out. You can see the highlighting around Levi's pictures-- this was to help me see where to cut.

To attach them to the plane, I used Mod Page(r) glue them into place by putting some on the back and then a coat to seal on the top. Since I used a laser printer to print out the pictures, I had to be very careful not to smear their faces, but it still blurred a little.

For the Danish Air Force roundels and tail flag, since I did not have any in my scrap decals I went into MS PowerPoint and created them to scale with the various shape art. Similar to the "pilots", I printed them out on our Canon MP380 laser jet, and I used Mod Page(r) to glue them into place. For the plane numbering, Levi was fine with some decals I had that had letters followed by numbers. Once everything was in place, I put a few coats of Tamiya acrylic semi-gloss clear-coat to hold everything on. After one last night of drying, the aircraft was ready for flight. Levi and Lucy really enjoy being the "pilots".

Final aircraft, ready to fly

PS: Levi did a slight modification to the aircraft after production, that can be seen in the photo: the plane was missing the "flames" that come out of the engine, so he hot glued a stick in the hollowed out engine nacelle. Works great as a fly stick

Tuesday, April 5, 2011

2 Hours to an A10 Fairchild Warthog (wood)

Another month and another wood model. I don't seem to find the time to get out the plastic kit gear, and with a nice Friday/Saturday it was time to add to Levi's air force.

After looking around various pictures on the Internet, Levi settled in on the A-10 Fairchild "Warthog" (although my maternal line is Fairchild, the link to the aircraft company is way back in the family tree somewhere).

First task was to find a diagram to help guide the top/side/front layout. Next, Levi and I dug through the scrap wood bins to find the right wood for the job. We settled on a 2x4x10" pine for the body, 2x3/16" for the wing, 1.5x1/4" for the tails.rudders and engine mount and 1" dowel for the engine. 20 minutes was spent as I scaled out the drawing and transferred it to the wood with a few modifications to allow it to be more rugged.

After the transfer, it took about 20 minutes to rough cut all the pieces -- the trickiest part is the body. The picture at the left is before we slimmed down the body (from 1.5" thick to around 1.25" thick with a taper on the tail).

The other aspect was creating notches for the wing, engine mount and tail assembly to fit into the body. While I could have brought out my router table, I decided to do it the "old fashioned" way by making a series of close cuts that allow you to snap out which is a lot more fun for a 5 year-old than watching his dad set up yet another piece of machinery that kids can't touch.

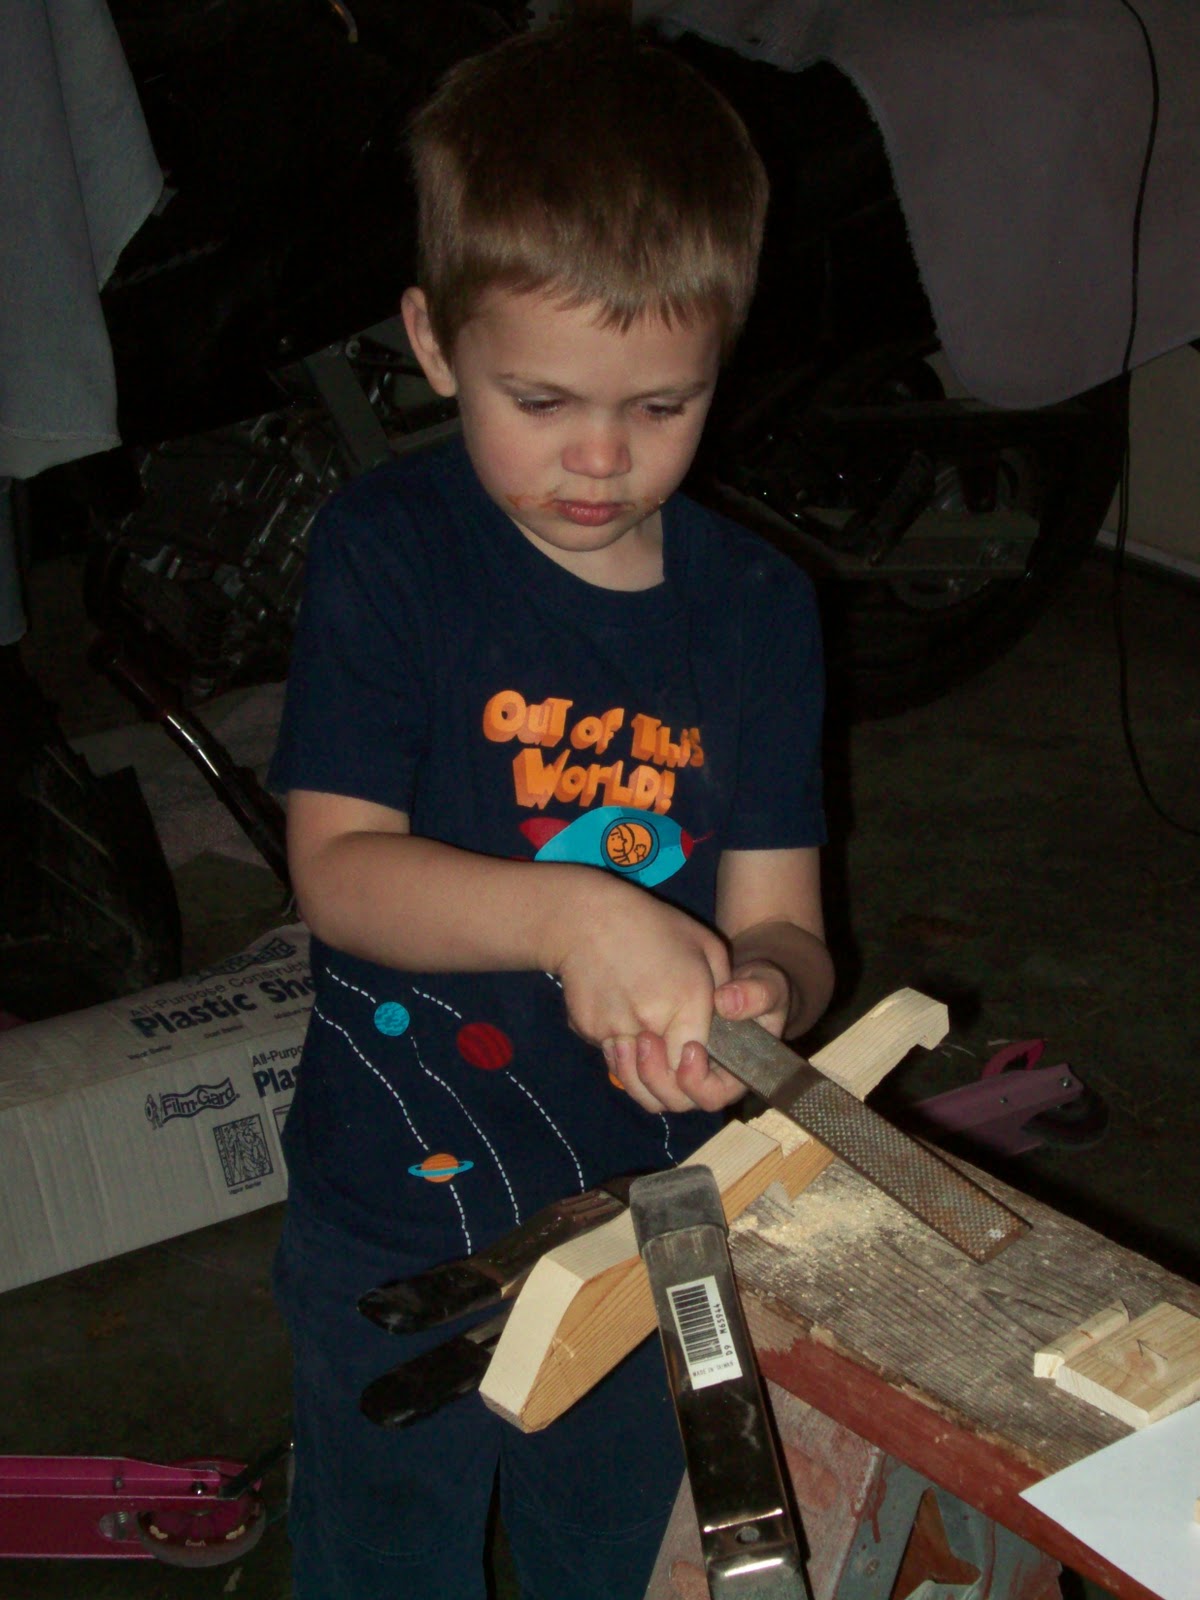
So after trimming down the thickness, Levi went to work cleaning out the notches. He thought the clamps were a lot more fun to set than it was to take a file and smooth out the rough wood (I wondered when he got tall enough to stand at the wood horse comfortably to work away).

It took about 10 minutes of work to get the three notches cleaned out with most of the time going by as Levi worked out different ways to clamp the body down. After he had cleaned out the notches, I decided that the cockpit needed a little more shaping so I took out my wood chisels and proceeded to shape out the cockpit area.

The next phase was to finish the shaping and finish sanding. I will just say that there is no photo evidence that shows that I did not in fact do all the sanding on the combo belt/disc sander and that no 5 year-old was anywhere near a power tool with some wood and his fingers (nor will you find any other evidence of the use of a finishing gun driving 2" brads to hold the engines to the aircraft except for me). After sanding the pieces into the final shapes and doing finish sanding on the pieces it was time for assembly. This took about 15 minutes.

As mentioned earlier, I employed my air driven finish nailer -- the main wing was glued and then tacked in place with 5/8" brads, as were the engine mounts and the elevator and the tail fins (I thought it was nerve wracking nailing the fins into the 1/4" elevators without having a brad shoot out of the wood until I decided to attach the engines with 2" brads going into 1/4" thick engine mounts). For the engines, I had sanded one side of the dowel a little flat to give a better hold. I spread some wood glue and slightly slid the engine back-and-forth on the mount until it stuck. Not content just to have glue holding these things to the wood, I switched out the 5/8" brads and put in the 2" brads. First pull, 1 brad in, nothing sticking out. I mount the other engine the same way (glue, rub, stick, brad) but this time I get 1/2 the brad sticking out of the wood. I decide that each engine should have 2 brads, so in goes 2nd brad, and this time there's about 1/4" brad sticking out of wood. Arggh. Then Levi wants to put one more in the other engine. After making sure that all fingers are out of harms way, I line up the gun, Levi pulls the trigger .... perfection! No excess brad. Finally tally on the engine: Levi 1, brads 0; Eric 1, brads 2 (I am thinking I should have Levi do some more of my finish work!). This took us 20 minutes.

Now came the most difficult part -- getting Levi to leave the plane to dry overnight.

Early the next AM, Levi is ready to go. We went on the Internet looking for paint schemes. Originally he wanted a green plane, but then he saw a picture of one in more of desert camo that to him looked like yellow with browns. So we went through the scrap paint bucket (we buy a lot of the $1 Michael's wood kits that give you paint, and we put the excess paint into a bucket for use on various other fun things).

Levi went to work painting most of the body and top of the wings in yellow. He also decided to have the cockpit and nose blue so he painted those as well. I then talked him into painting yellow dots in various places to help with the camo. After painting the plane and some of his face yellow, Levi declared he was done and that I was to finish off the camo. I decided on a two-tone brown (one light, one dark) and proceeded to paint away. For some detail, we added black to the front/back of the engine nacelles as well as on top of the tail fin (per the picture we found on the Internet. He is a stickler for some details).

While the 45 minutes of painting was "forever" for Levi, it just about killed him waiting for the paint to dry. Once dry, Levi was quick to get the A10 aircraft ready for its maiden flight.

The beauty of this design is that just like the real aircraft, this model is squat, heavy and tough -- not too many delicate parts to get broken.