
After looking around various pictures on the Internet, Levi settled in on the A-10 Fairchild "Warthog" (although my maternal line is Fairchild, the link to the aircraft company is way back in the family tree somewhere).
First task was to find a diagram to help guide the top/side/front layout. Next, Levi and I dug through the scrap wood bins to find the right wood for the job. We settled on a 2x4x10" pine for the body, 2x3/16" for the wing, 1.5x1/4" for the tails.rudders and engine mount and 1" dowel for the engine. 20 minutes was spent as I scaled out the drawing and transferred it to the wood with a few modifications to allow it to be more rugged.

The other aspect was creating notches for the wing, engine mount and tail assembly to fit into the body. While I could have brought out my router table, I decided to do it the "old fashioned" way by making a series of close cuts that allow you to snap out which is a lot more fun for a 5 year-old than watching his dad set up yet another piece of machinery that kids can't touch.
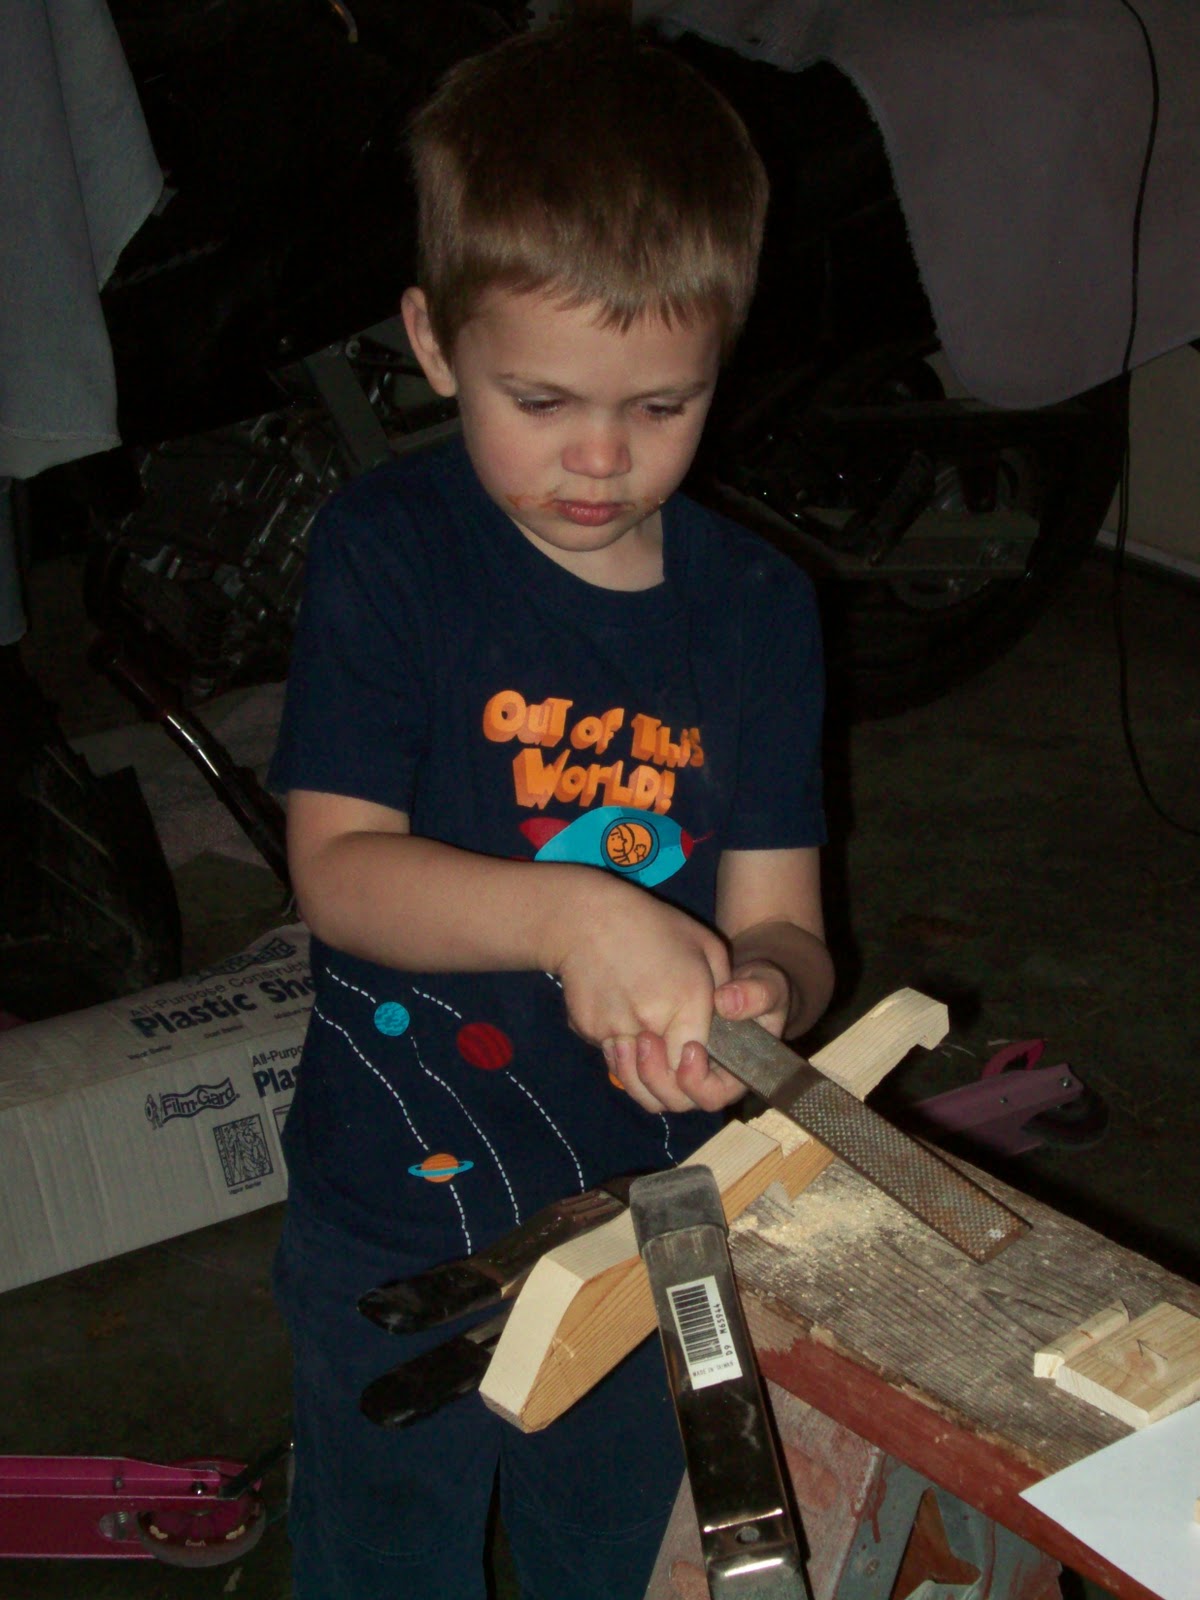
So after trimming down the thickness, Levi went to work cleaning out the notches. He thought the clamps were a lot more fun to set than it was to take a file and smooth out the rough wood (I wondered when he got tall enough to stand at the wood horse comfortably to work away).
It took about 10 minutes of work to get the three notches cleaned out with most of the time going by as Levi worked out different ways to clamp the body down. After he had cleaned out the notches, I decided that the cockpit needed a little more shaping so I took out my wood chisels and proceeded to shape out the cockpit area.
 The next phase was to finish the shaping and finish sanding. I will just say that there is no photo evidence that shows that I did not in fact do all the sanding on the combo belt/disc sander and that no 5 year-old was anywhere near a power tool with some wood and his fingers (nor will you find any other evidence of the use of a finishing gun driving 2" brads to hold the engines to the aircraft except for me). After sanding the pieces into the final shapes and doing finish sanding on the pieces it was time for assembly. This took about 15 minutes.
As mentioned earlier, I employed my air driven finish nailer -- the main wing was glued and then tacked in place with 5/8" brads, as were the engine mounts and the elevator and the tail fins (I thought it was nerve wracking nailing the fins into the 1/4" elevators without having a brad shoot out of the wood until I decided to attach the engines with 2" brads going into 1/4" thick engine mounts). For the engines, I had sanded one side of the dowel a little flat to give a better hold. I spread some wood glue and slightly slid the engine back-and-forth on the mount until it stuck. Not content just to have glue holding these things to the wood, I switched out the 5/8" brads and put in the 2" brads. First pull, 1 brad in, nothing sticking out. I mount the other engine the same way (glue, rub, stick, brad) but this time I get 1/2 the brad sticking out of the wood. I decide that each engine should have 2 brads, so in goes 2nd brad, and this time there's about 1/4" brad sticking out of wood. Arggh. Then Levi wants to put one more in the other engine. After making sure that all fingers are out of harms way, I line up the gun, Levi pulls the trigger .... perfection! No excess brad. Finally tally on the engine: Levi 1, brads 0; Eric 1, brads 2 (I am thinking I should have Levi do some more of my finish work!). This took us 20 minutes.

Now came the most difficult part -- getting Levi to leave the plane to dry overnight.
Early the next AM, Levi is ready to go. We went on the Internet looking for paint schemes. Originally he wanted a green plane, but then he saw a picture of one in more of desert camo that to him looked like yellow with browns. So we went through the scrap paint bucket (we buy a lot of the $1 Michael's wood kits that give you paint, and we put the excess paint into a bucket for use on various other fun things).
 Levi went to work painting most of the body and top of the wings in yellow. He also decided to have the cockpit and nose blue so he painted those as well. I then talked him into painting yellow dots in various places to help with the camo. After painting the plane and some of his face yellow, Levi declared he was done and that I was to finish off the camo. I decided on a two-tone brown (one light, one dark) and proceeded to paint away. For some detail, we added black to the front/back of the engine nacelles as well as on top of the tail fin (per the picture we found on the Internet. He is a stickler for some details).
While the 45 minutes of painting was "forever" for Levi, it just about killed him waiting for the paint to dry. Once dry, Levi was quick to get the A10 aircraft ready for its maiden flight.
The beauty of this design is that just like the real aircraft, this model is squat, heavy and tough -- not too many delicate parts to get broken.